-
Tip of the day 🙂 How to change the font size in your result grid in SSMS
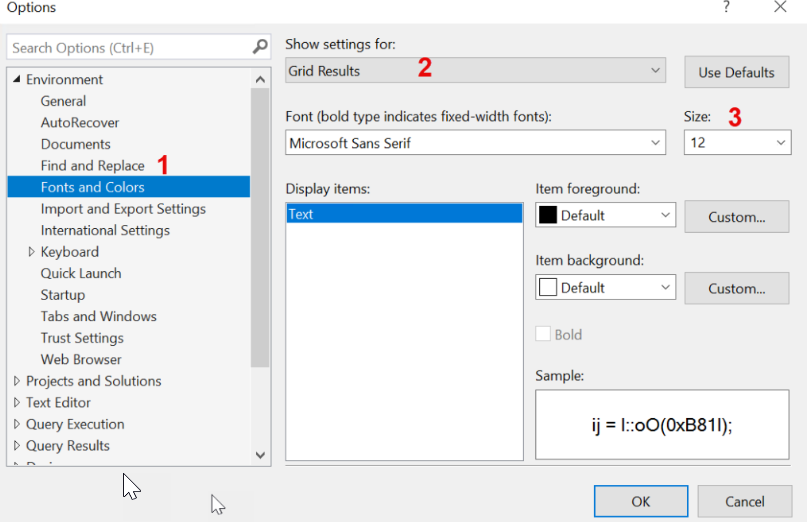
Just a nice litlte tip, so I can remember it myself if I need to change it again at some point 🙂 When you are presenting or sharing your screen with others, and they have another resolution than you, it can be hard to see the small things on the screen. In SQL Server Management… Continue reading
-
How to dynamically copy specific tables from source systems with Azure data factory
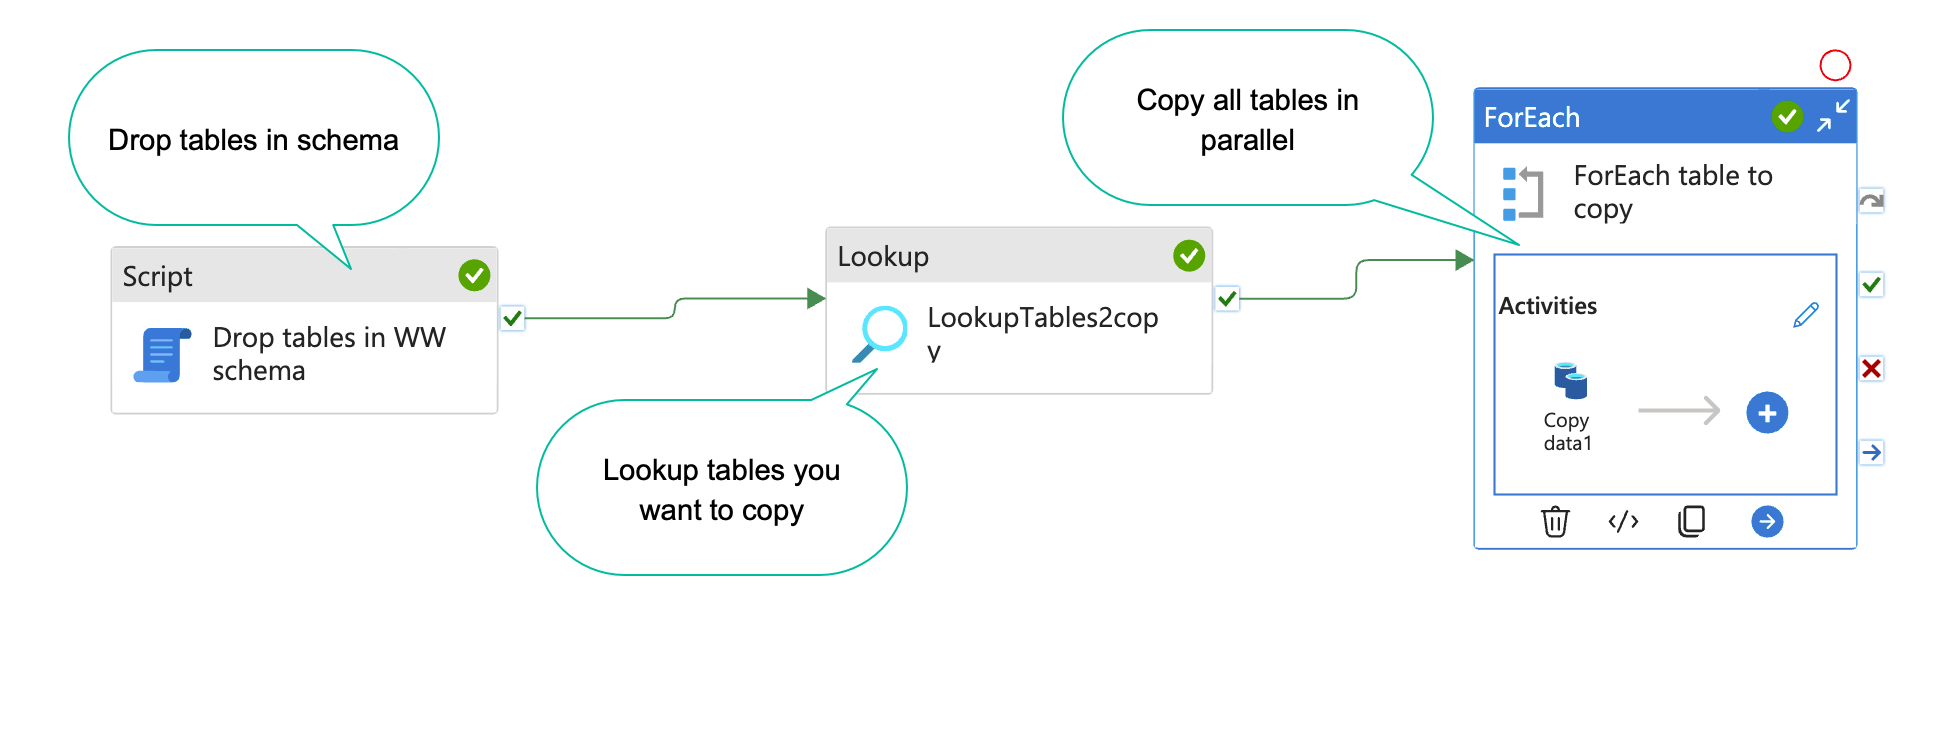
When you are working on a data project, you often have a list of tables you want to copy to your DWH database or staging database. With Azure data factory(ADF), this is easy to set up(Kind of). In this blog post, I will show you how. The result will end up looking something like the… Continue reading
-
Guide: Setup data factory to run locally
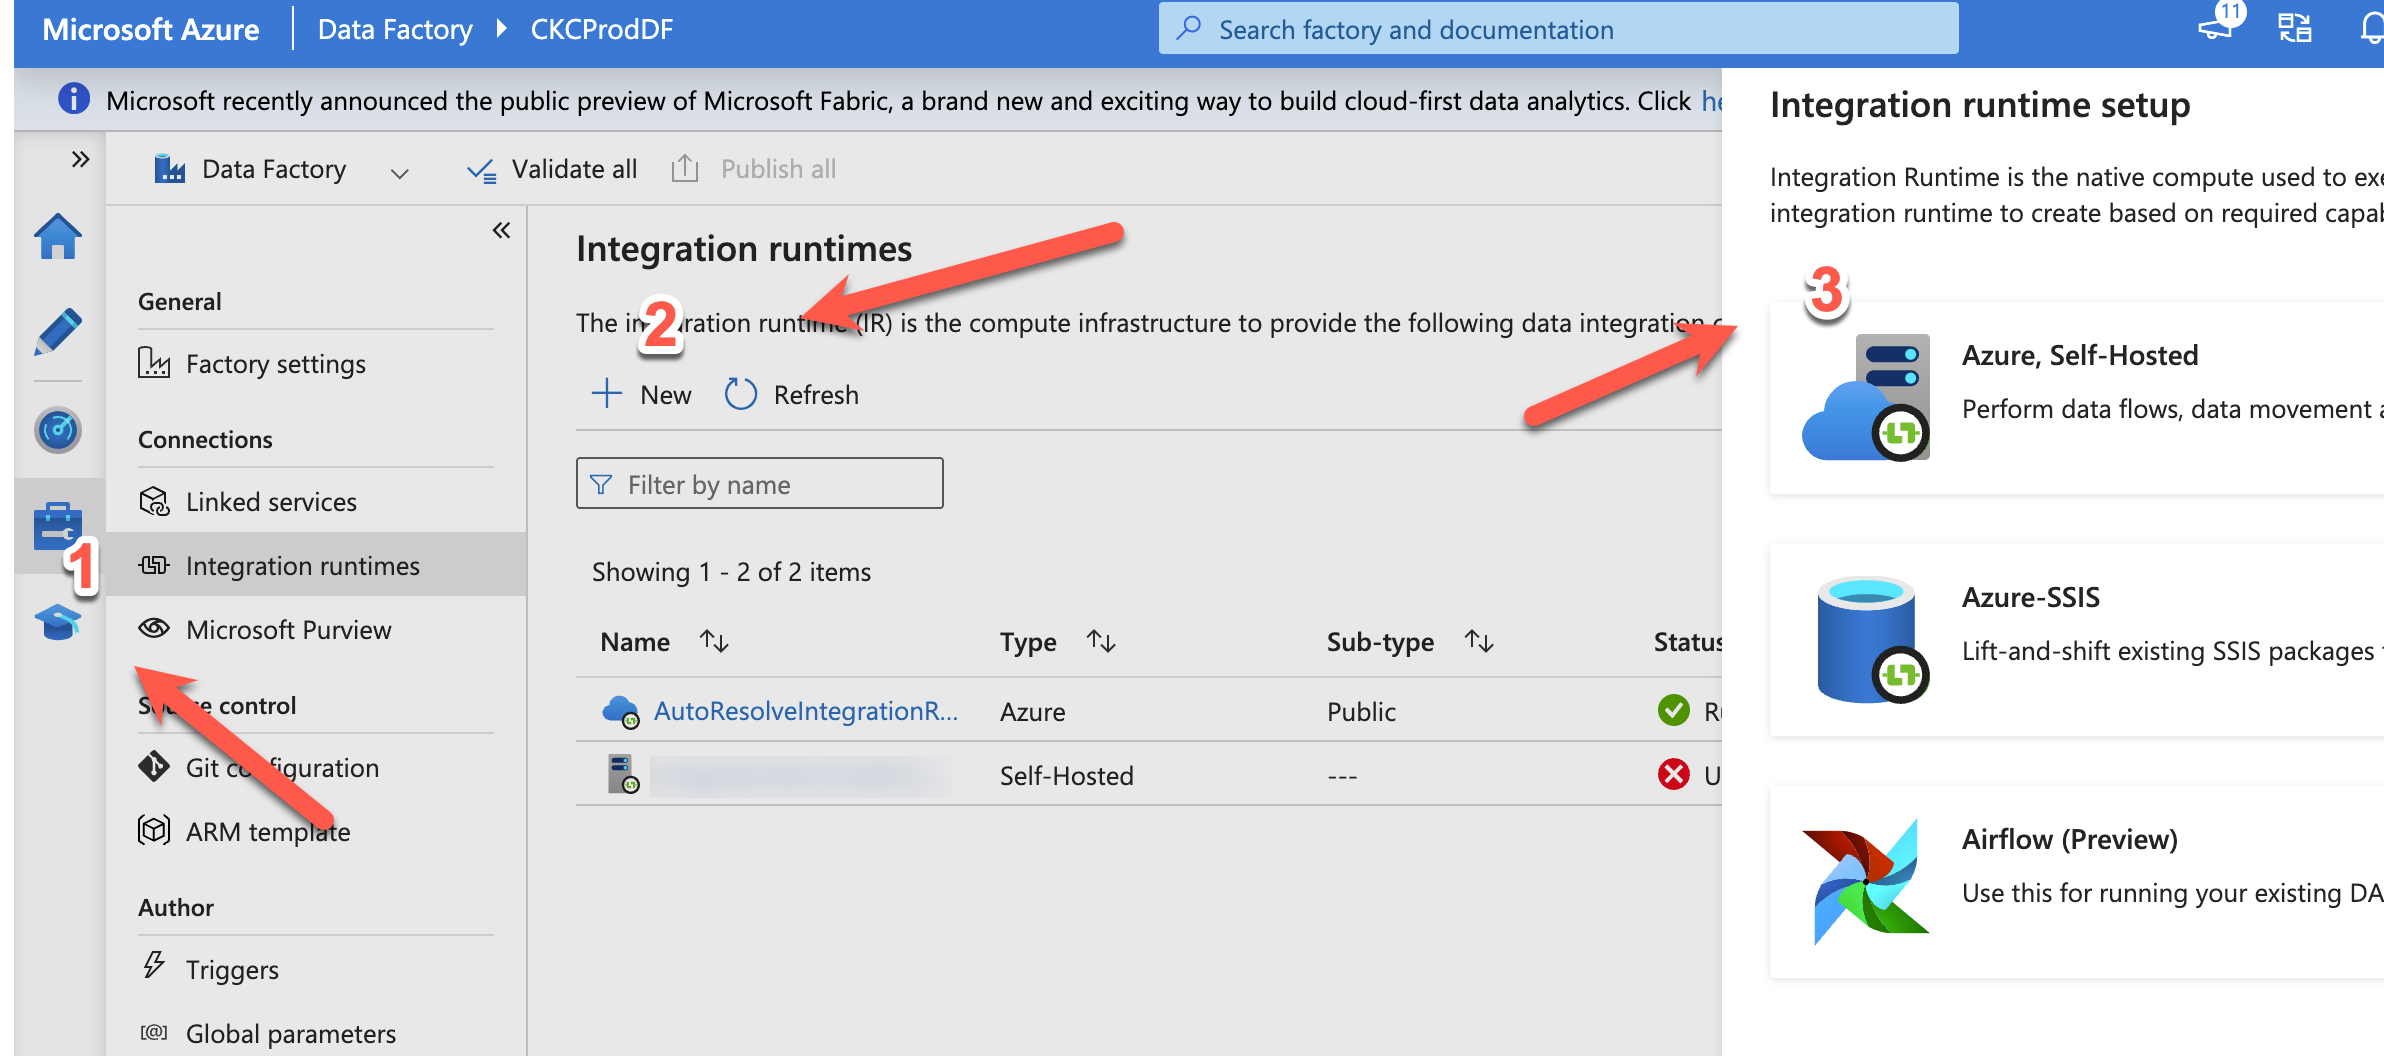
Azure Data Factory (ADF) is Microsofts cloud based ETL tool. It is in many ways, better than their old on-premise ETL tool “integration services”. Luckily, you can easily set up ADF to move data around on-premise. In this blog post, I will show you how 🙂 I will assume you already have an ADF running,… Continue reading
-
How to scale your azure sql database with SQL
An Azure sql database is super easy and cheap to setup and use. However, if you want to do some serious data manipulation, you will find the cheapest versions are to slow to use, and every upgrade you make on the sql database, is a doubling in price. If you are a data engineer, like… Continue reading
-
How to create sql azure login and user
I use sql azure databases a lot. Both as backend, datamarts and also for data exchange layer with 3. parties. For that, I need to create users fast and easy. There is no interface for doing that in SQL azure, so you have to do it with SQL. Step 1: Connect to sql with manegement… Continue reading
-
How to: Change the length of an attribute in MS MDS
You would think that it would be easy to change the length of an attribute in MDS, but going to the webinterface might make you think otherwise. The length parameter is greyed out. But fear not. Instead open the table with your excel plugin Click on the column you want to change, click attribute properties,… Continue reading
-
A quick look at System-Versioned Tables in SQL server 2016
SQL server 2016 has been available for preview for some time now. One of the more exiting features I am looking forward to is system versioned tables. As a DWH developer, one of the things, you spent a lot of time with, is developing dimension tables with columns that stores history. The history is typically… Continue reading
-
Error code: 0x80040E21 Reading from SSAS with SSIS
So, I upgraded a big project for a customer to 2012 from 2008R2. Everything worked fine, except the last part, where some datamarts was loaded with SSIS from SSAS. They had worked with no problem before, but suddenly, I received the above error code. It made no sense to me, and it was hard to… Continue reading
-
Partitioning revisited
When building big data warehouses(DWH), partitioning tables is something you want to consider. There is some good examples/explanations in BOL, but with this blog post I just want to give som easy hands on examples, so you can get started right away. What Partitioning tables is splitting up the data in a table, so the… Continue reading