
When I have my data model in my Power BI dataset, there are several reasons, I want to update it when I am done with my ETL. Among others:
- I don’t know how long the ETL process will take over time, and I want to update the dataset as soon as it is done
- I want to scale down the database after the power BI dataset updates
So in this blog post, I will show how to do it from data factory (ADF).
It is a lot of steps, and I will assume you have access to your Azure portal, already have created a data factory, and have admin access to your Power BI portal.
Step 1 – The Power BI rest API
To do it, we will use the Power BI rest API. The documentation for how to use the update is here:
https://learn.microsoft.com/en-us/rest/api/power-bi/datasets/refresh-dataset-in-group
where you can see it is a post request like this

Where groupId is the workspace ID, and datasetId is the dataset ID.
To find the workspace ID, go to the workspace in Power BI, and check the URL
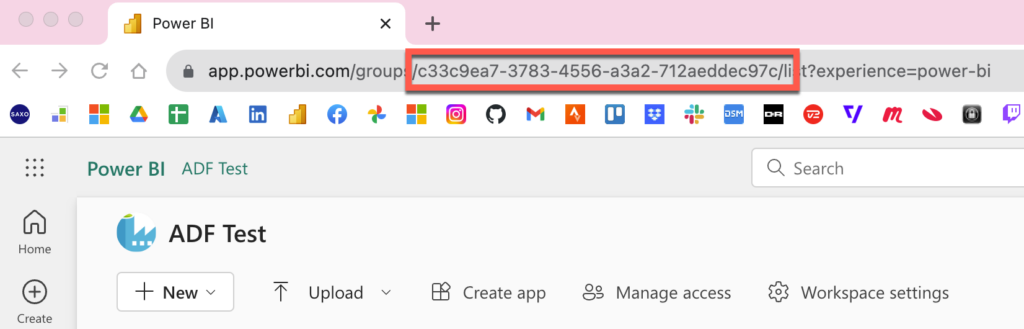
It is the guid after the group folder.
Click on the dataset you want to update. The dataset id is the guid after the dataset folder.

Step 2 – Allow ADF to update a Power BI dataset
To allow ADF access to update the dataset is kind of tricky, and we have to use the Azure Active Directory. Go to the Azure portal, and click it. It will look something like this
When you click it, you will see something like this.
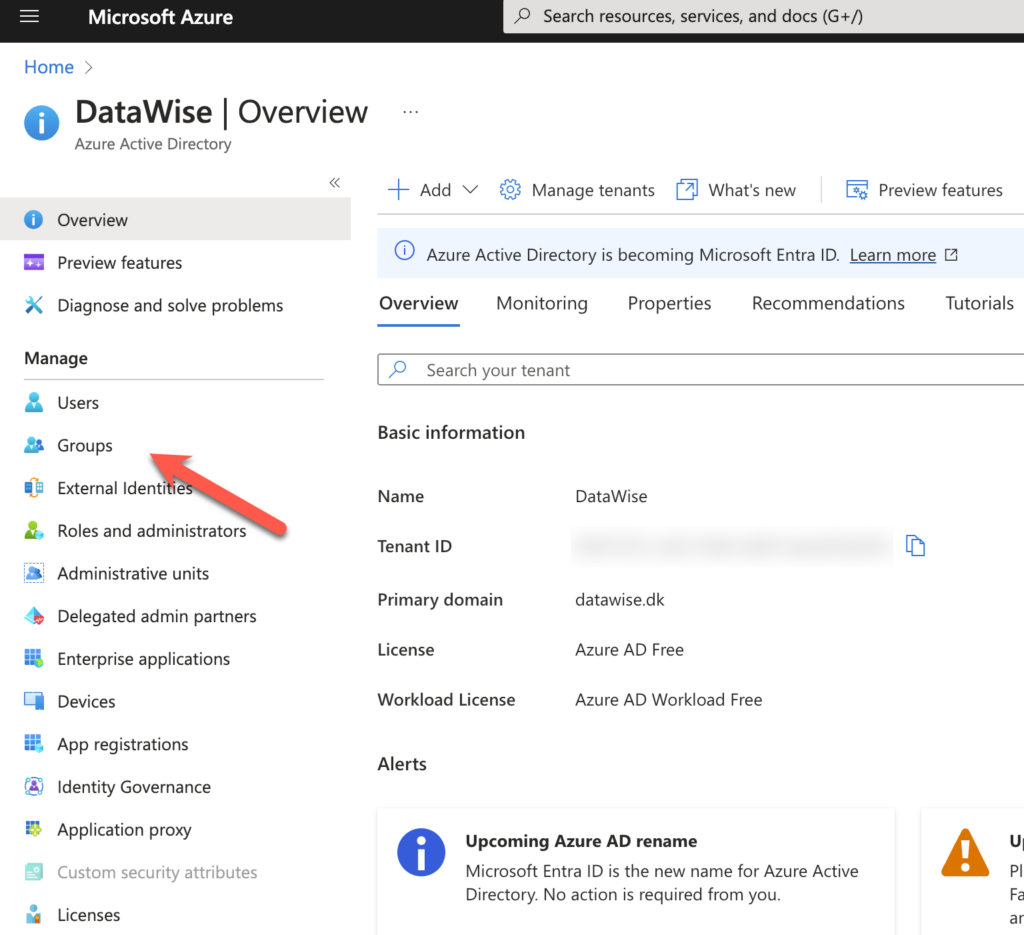
Go to the groups as marked in the image above.
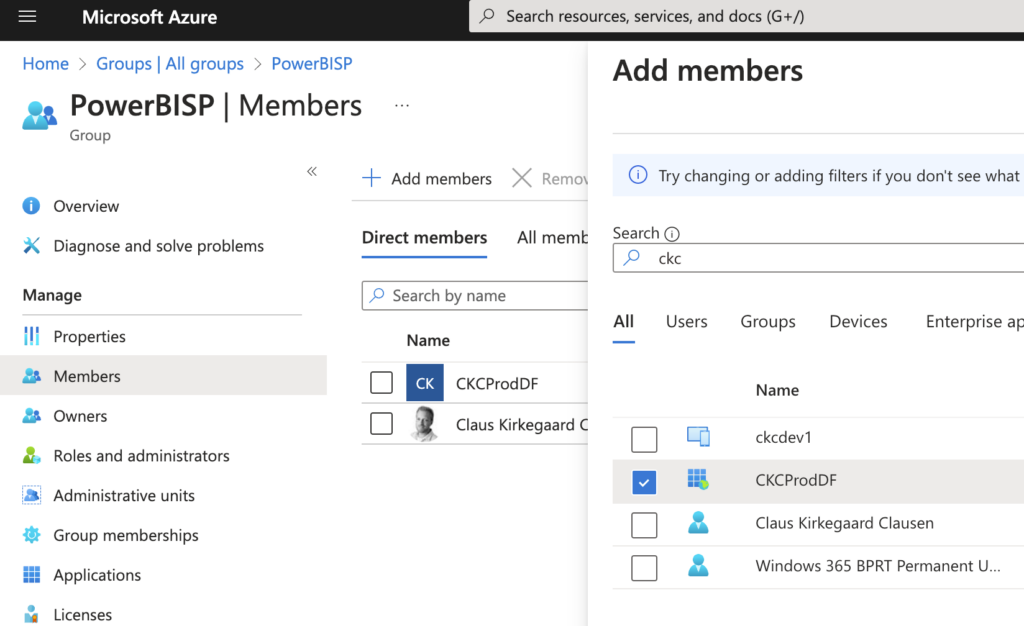
Click new group, and create a new group, where the group type is security. Give it a good name 🙂 In my example I use PowerBISP. When it is created, click the members, and click add members, and search for the name of your already created data factory, as shown below. The name of my ADF is CKCProdDF.
Step 3 – Setup Power BI
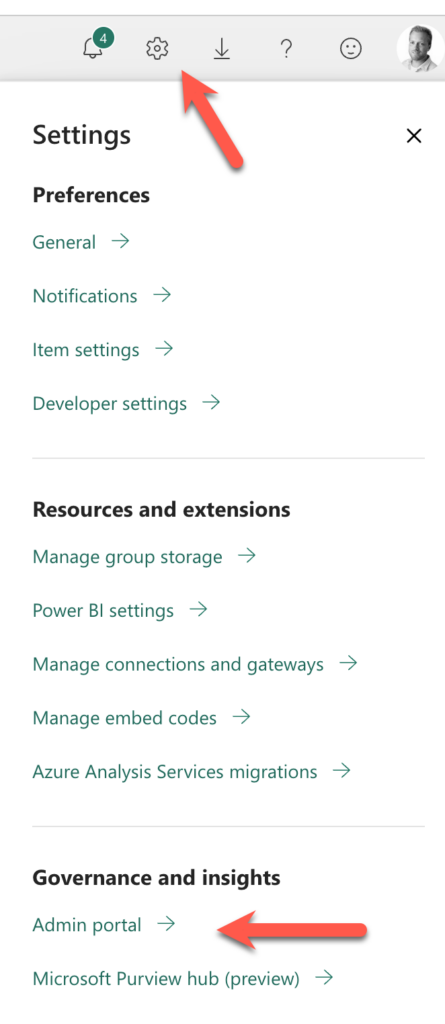
For this to work, we also need to do some setup in Power BI. First, we need to change a tenant setting. Go to the admin portal by clicking the menus shown below:
Scroll down to developer settings, and add your newly created security group. It should look something like shown below:
The last thing to do in Power BI, is to give the same security group admin access to the workspace where you want to update the dataset.
Step 4 – Create the pipeline
And now, we can finally go to ADF and create our pipeline. In ADF, create the pipeline, and drag in the web component, like shown below.
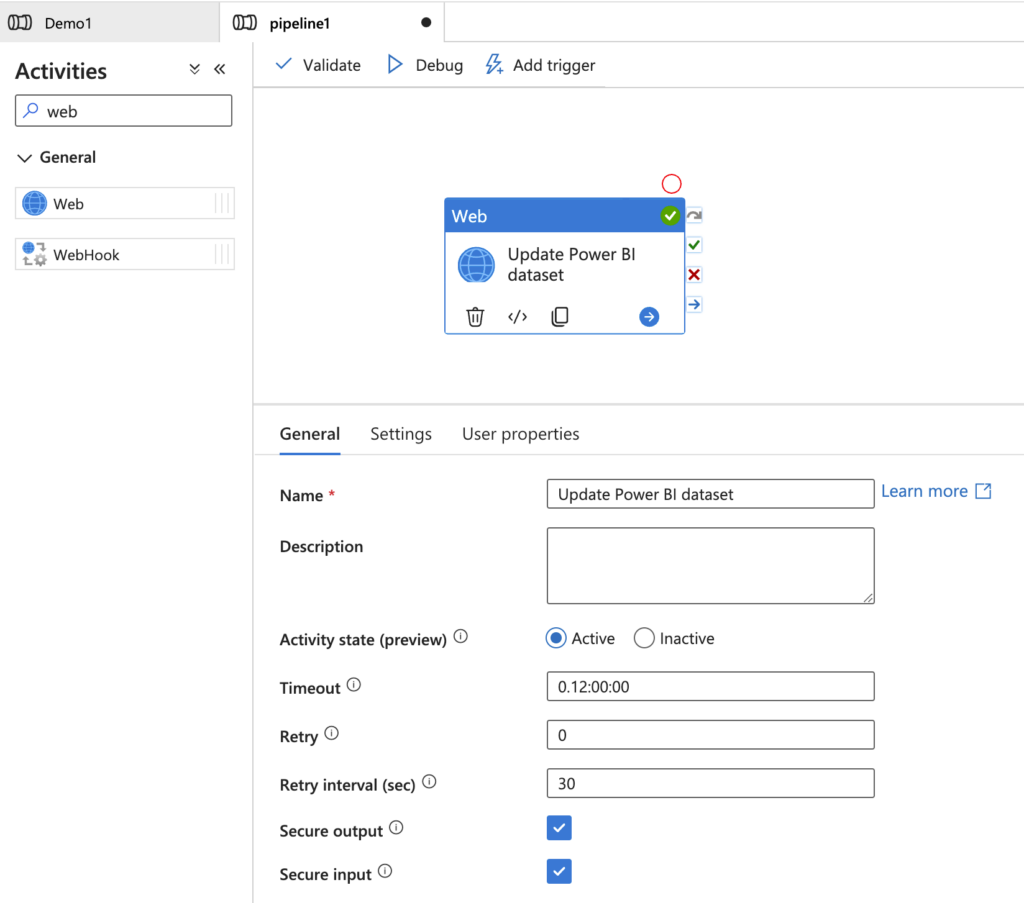
Check the secure input and output boxes.
Go to settings. It should look something like this
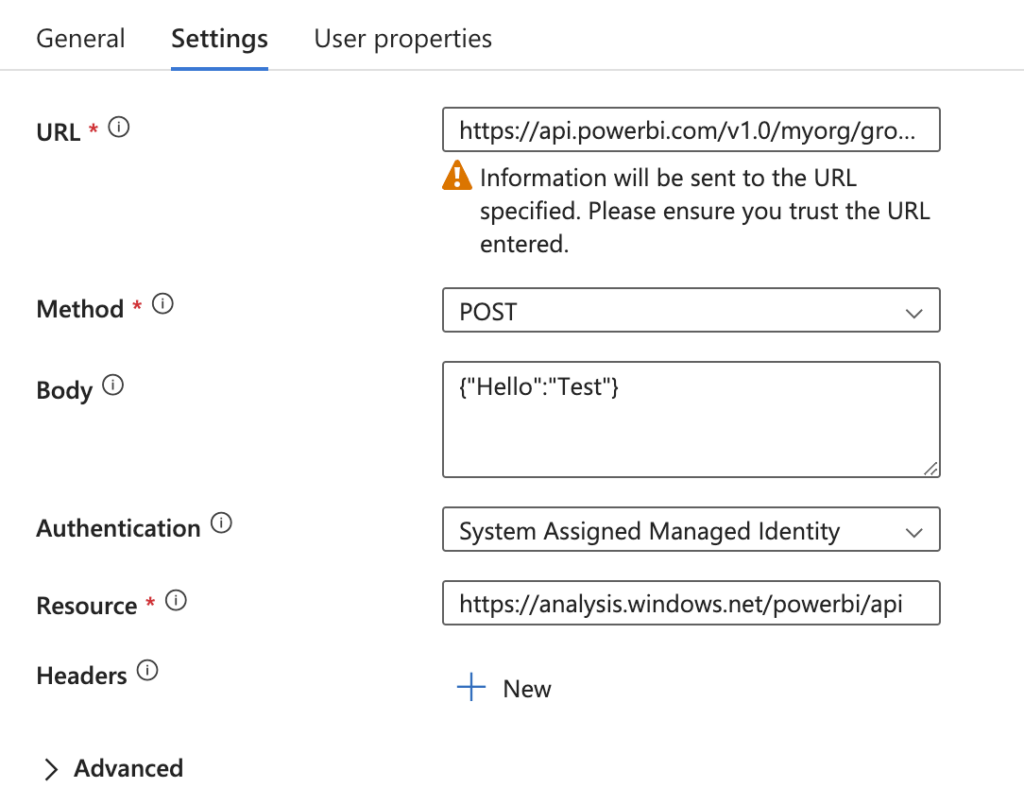
- The URL is the URL from step 1
- Method is POST
- Body we don’t need.
- Authentication is System Assigned Managed Identity.
- The Resource is just https://analysis.windows.net/powerbi/api
And now, everything should work. Go ahead and validate and run your pipeline.
When the pipeline is done, go to the Power BI dataset refresh history, and have a look.
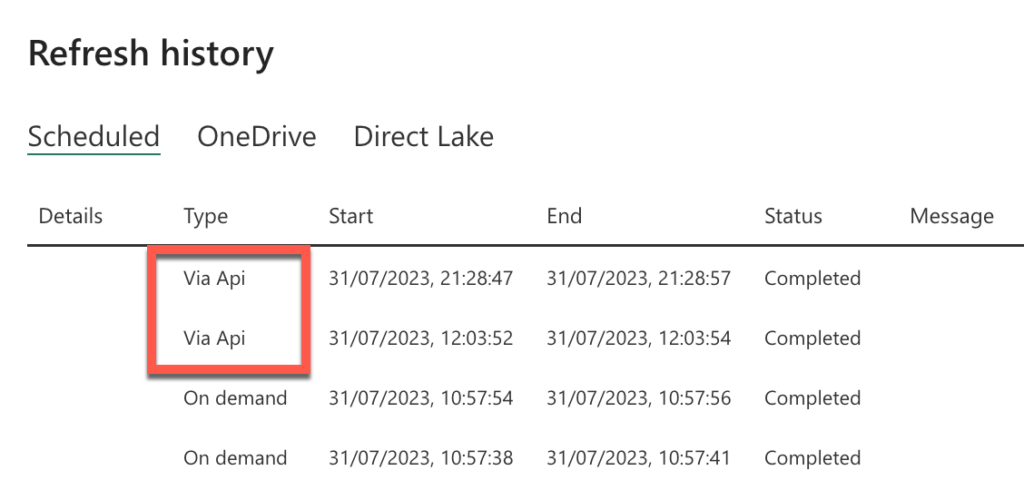
You should see a successful refresh, with the type “Via Api” as above.
All Done!!!! 🙂
Conclusion
This is kind of complicated to set up. But when it is done, it is nice you can update all the dataset quite easily, by using the same component in ADF. And all you have to change is the 2 guids from step 1.
I hope you will find this useful 🙂
Leave a Reply