

Introduction
Source control in the Microsoft BI and datastack have always been a little hard to do. It was hard in the old days, with SSIS and SSAS, and it is also hard with Power BI. To name a few obstacles:
- The semantic model (Formerly known as dataset), is just one file.
- The semantic model can also contain large amount of sensitive data, so there is a security and GDRP issue when using GIT.
There is of course also some major downsides with not using source control systems such as GIT.
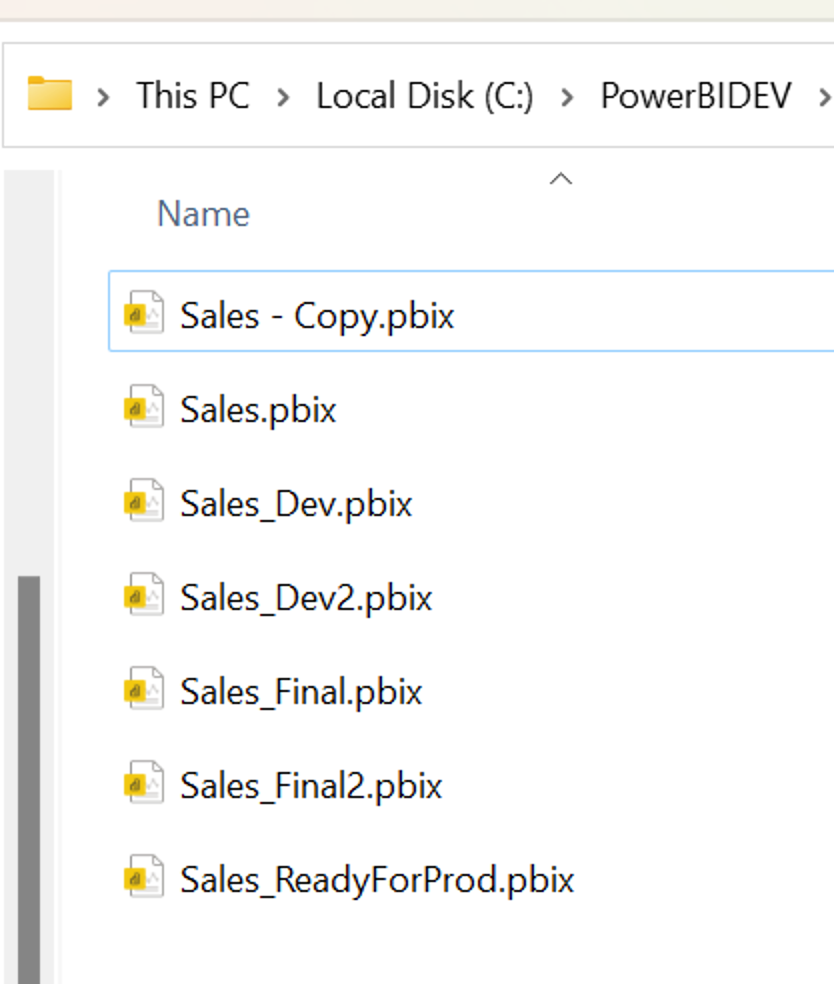
- If you are using a file share to store your power BI reports and semantic models, you can fast end up with something like this
- Some users can also edit the report directly in the workspace. If that is the case, then you have to download the report to make sure, that you are working on the latest version.
- Backup is also hard, because, which file is the correct one.
So even thoug it is hard, there is something to gain with setting up your Power BI dev envirement with GIT. So in this blog post, I will show you how to do it. Lets get startet 🙂
Power BI Desktop – setup
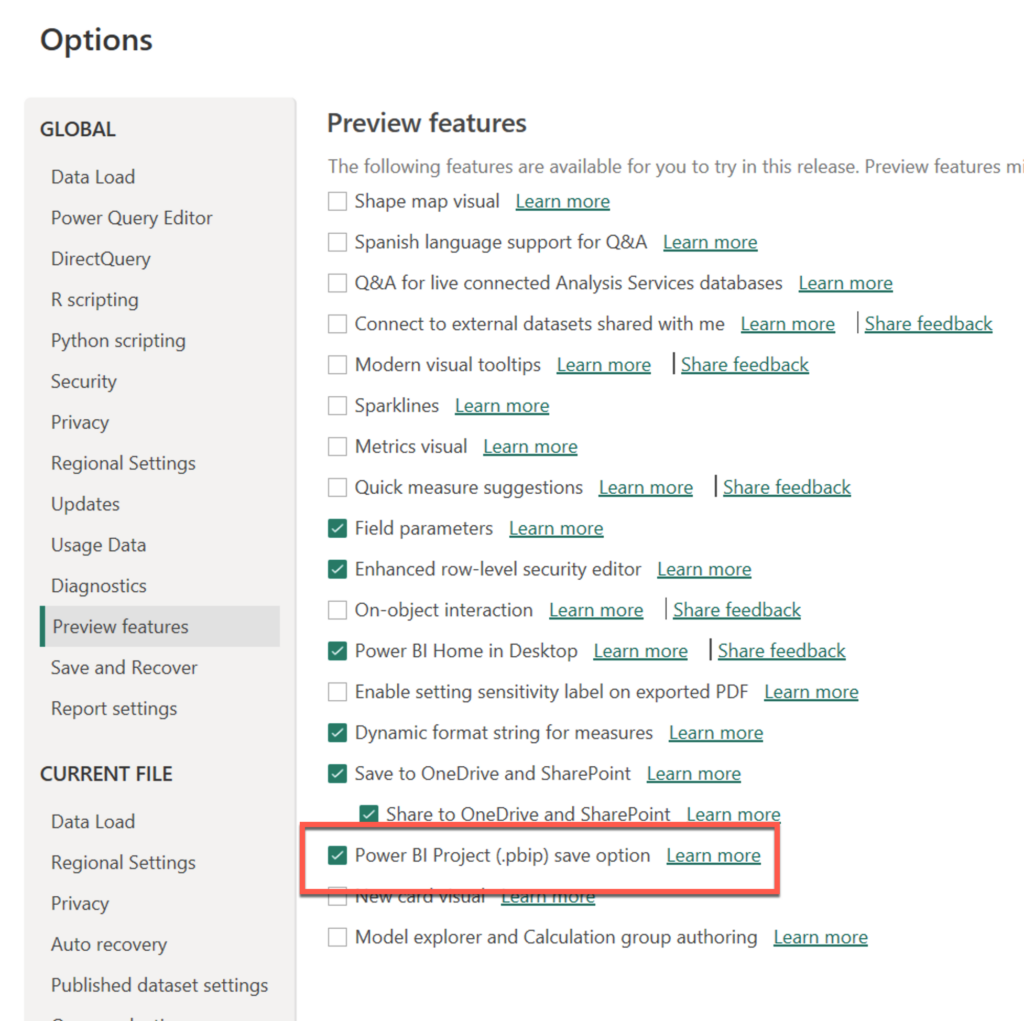
Before we can use GIT, we need to enable PowerBI desktop to save a power BI file, as a project. It is still a preview feature. To do that, go to options–>Preview feature and select Power BI projects, as shown below.
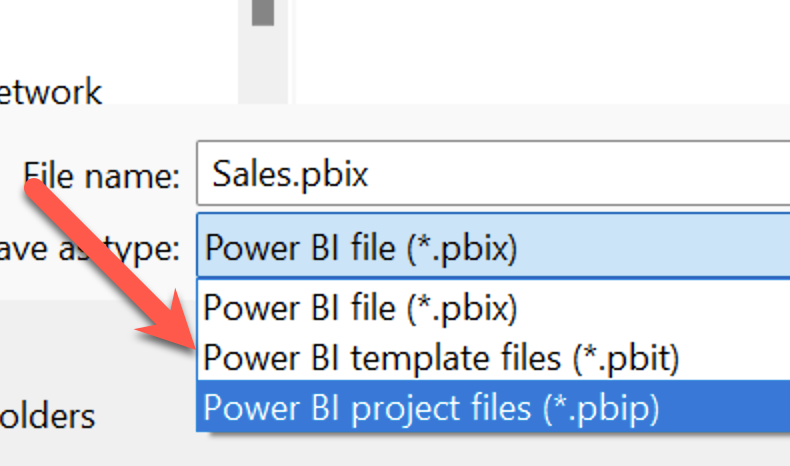
When you have done that, we can open a normal Power BI file, and save it as a project. Just click save as, and go the folder where you want to save the new project. I will look like below.
Your workspace will now look something like this.
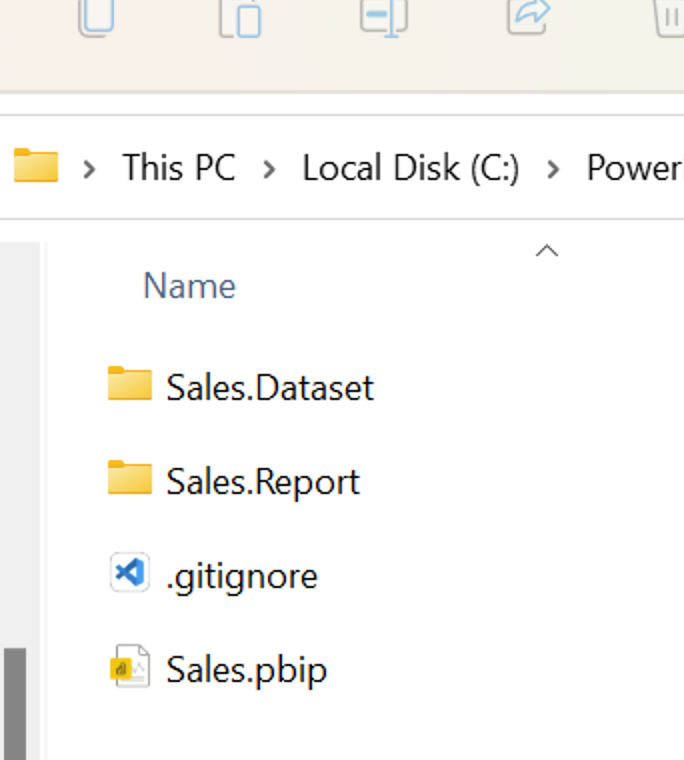
As you can see, the Power BI file is split up into foldes with different files.
- The dataset folder(Which will probably be renamed to Semantic Model soon), is where the files relating to the dataset is.
- The report folder, is where the files relating to the report layout is. You can make a copy of it, and then have multiple reports pointing to the dataset.
- The git ignore file, is created automatic by Power BI desktop. This is the file, that make sure, we dont get the data into git, but only the meta data.
- The Sales.pbip is still the one you double click to open and edit the report i Power BI desktop.
One of the benefits of splitting this up into files is that you now can edit the files, with different editors. Like editing the dataset with tabular editor, or editing the reports files with VS code or notepad++.
GIT – setup
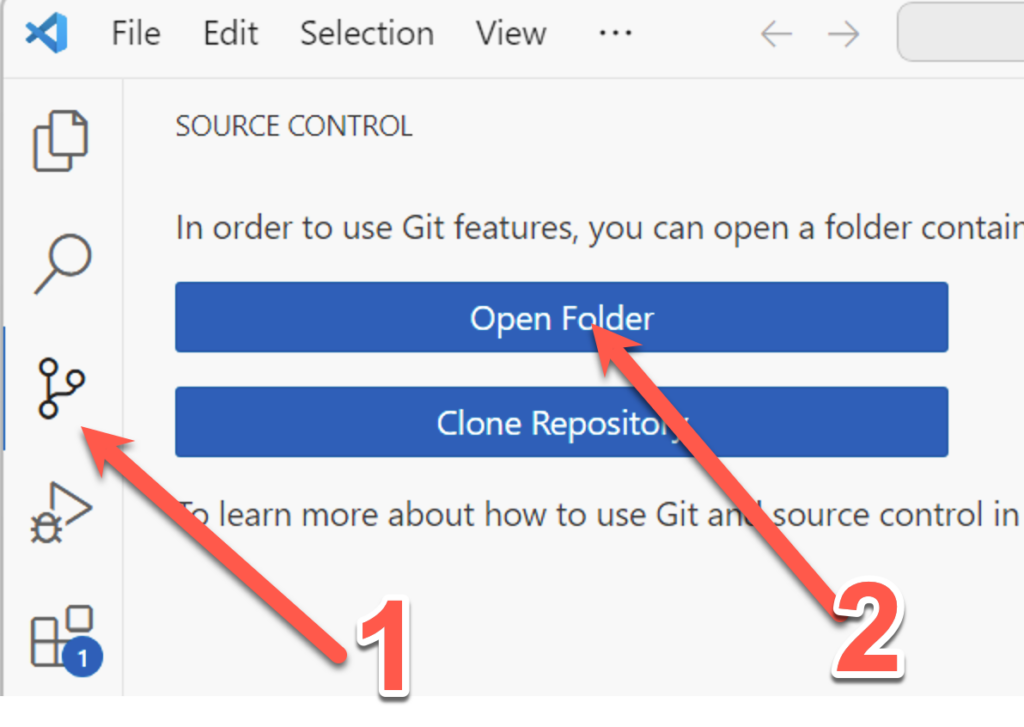
To use commit/push/pull/branch etc. from GIT, we need a GIT client. There are many to choose from, but VS code is a nice client, and most data engineers already have that. Open VS code, and click the source control as below. If you don’t have git installed, click and follow the guide to install it. After click open folder, as shown below.
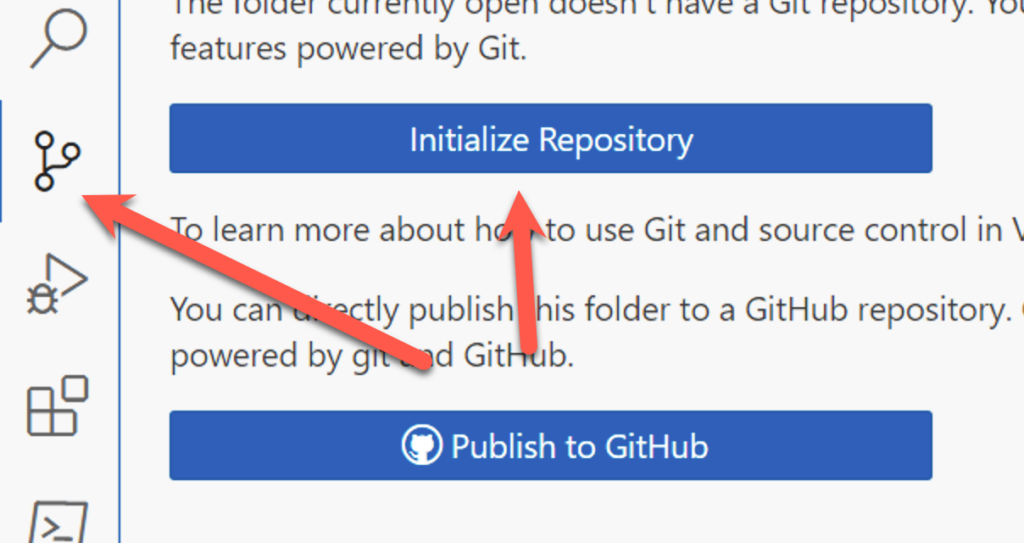
Open your dev folder, and click on the source control icon again, and click Initialize Repositiry as below.
You now commit, make changes, commit or do other GIT commands. Your VS code should look something like this:
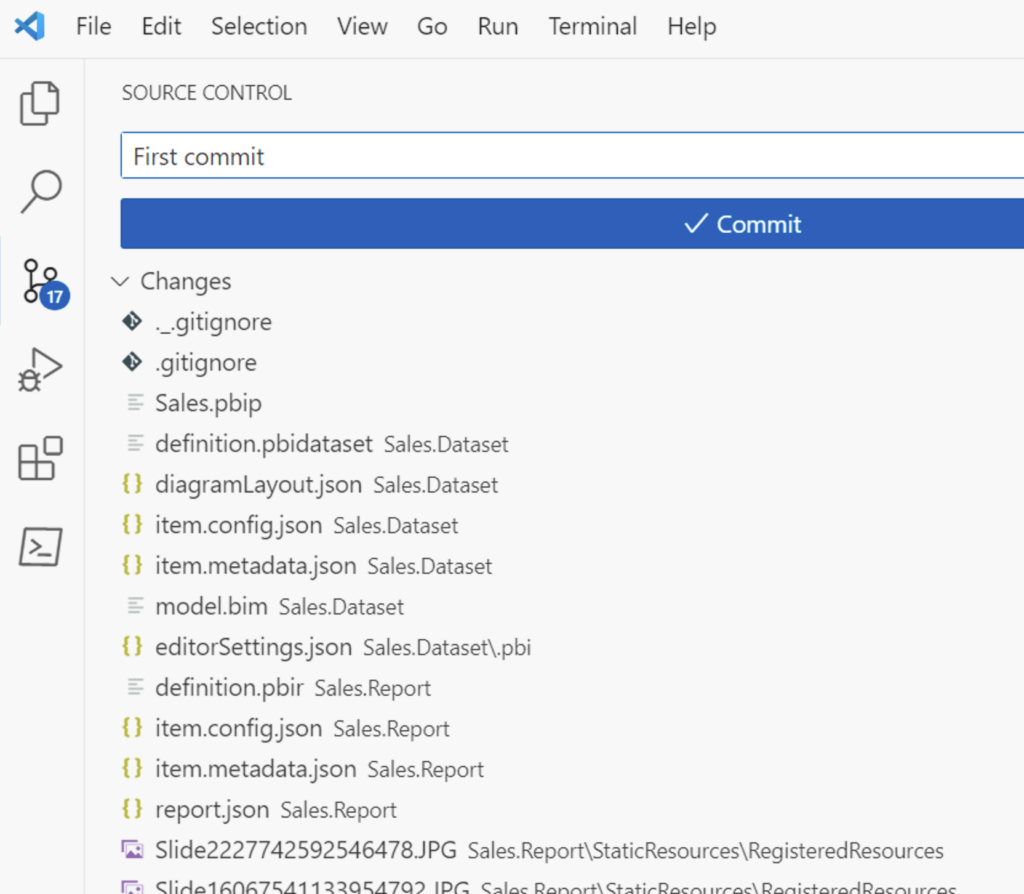
Commit your changes.
We can now publish to Github or Azure devops. Because we want to sync our repository with a Power BI workspace, we will use Azure devops. This is not possible from Github yet, but according to Mohammad Ali, the Power BI program manager, this will come in the near future.
Azure Devops – Setup
To setup Azure devops, go to https://dev.azure.com/, and login with your MS account. Click create new project. You will get a window like this
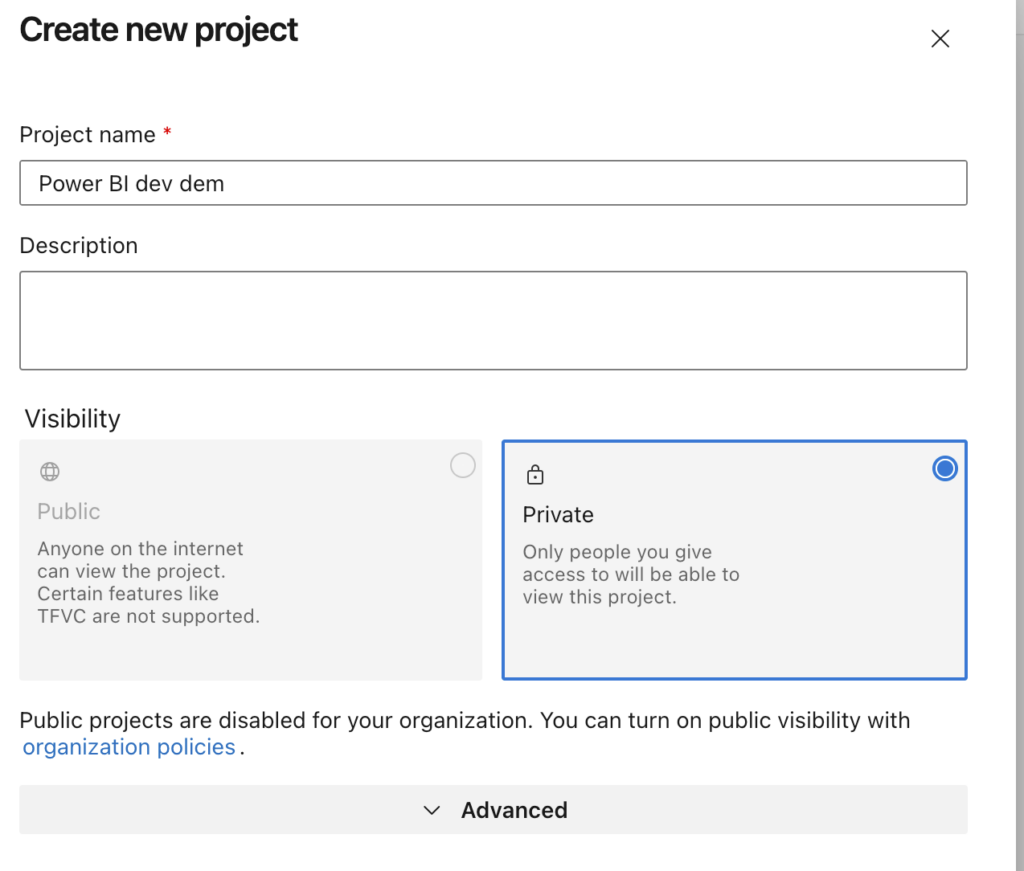
Select private, and click create.
Wait until it is created, and then navigate to repos->File, and copy the clone URL
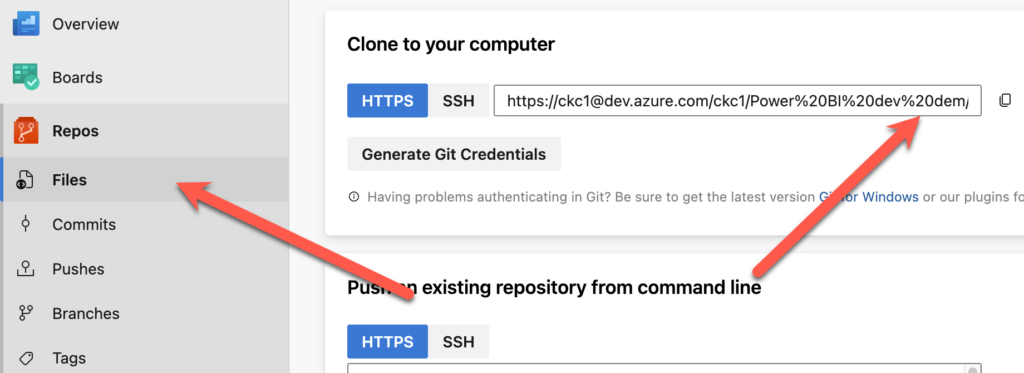
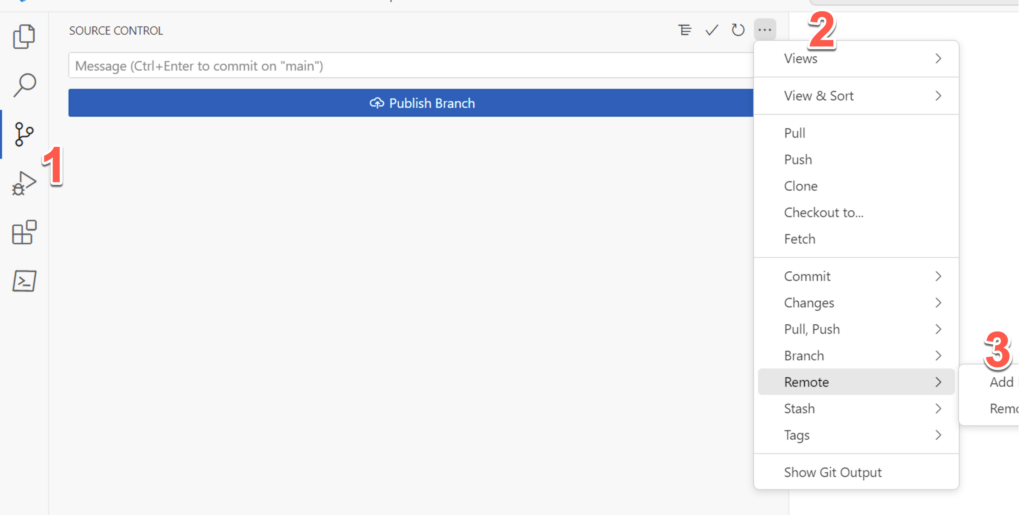
Now, go back to VS Code->Click source control again->Click the …->Click remote->Add, and paste in the URL.
Login with your windows credentials, if prompted.
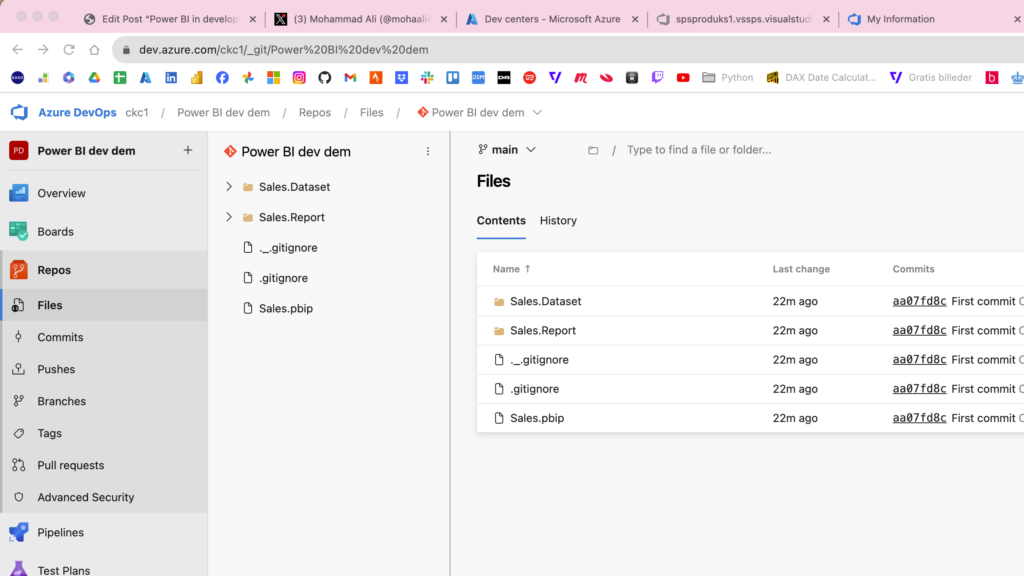
Click puublish, to publish your work. In Azure devops, you should now see your files like this:
Next, we want to sync our changes, to a Power BI workspace.
Connect a Power BI workspace to a Azure devops repo
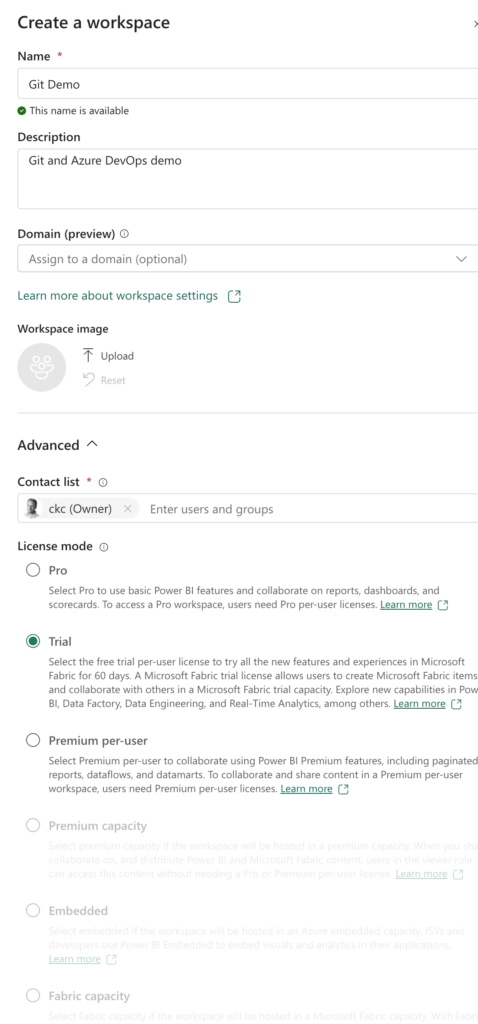
Now we have a setup, where multiple developers can develop on our Power BI reports and semantic models. That is great, and a huge improvements compared to just have the Power BI reports on a fileshare. But wait, there is more 🙂 We can also connect the repo directly to a Power BI workspace. To do that, create a new workspace, and select the trial. This is not available in the pro license.
When it is created, go to workspace settings, click Git integration, select the repository you just created and click connect and sync.
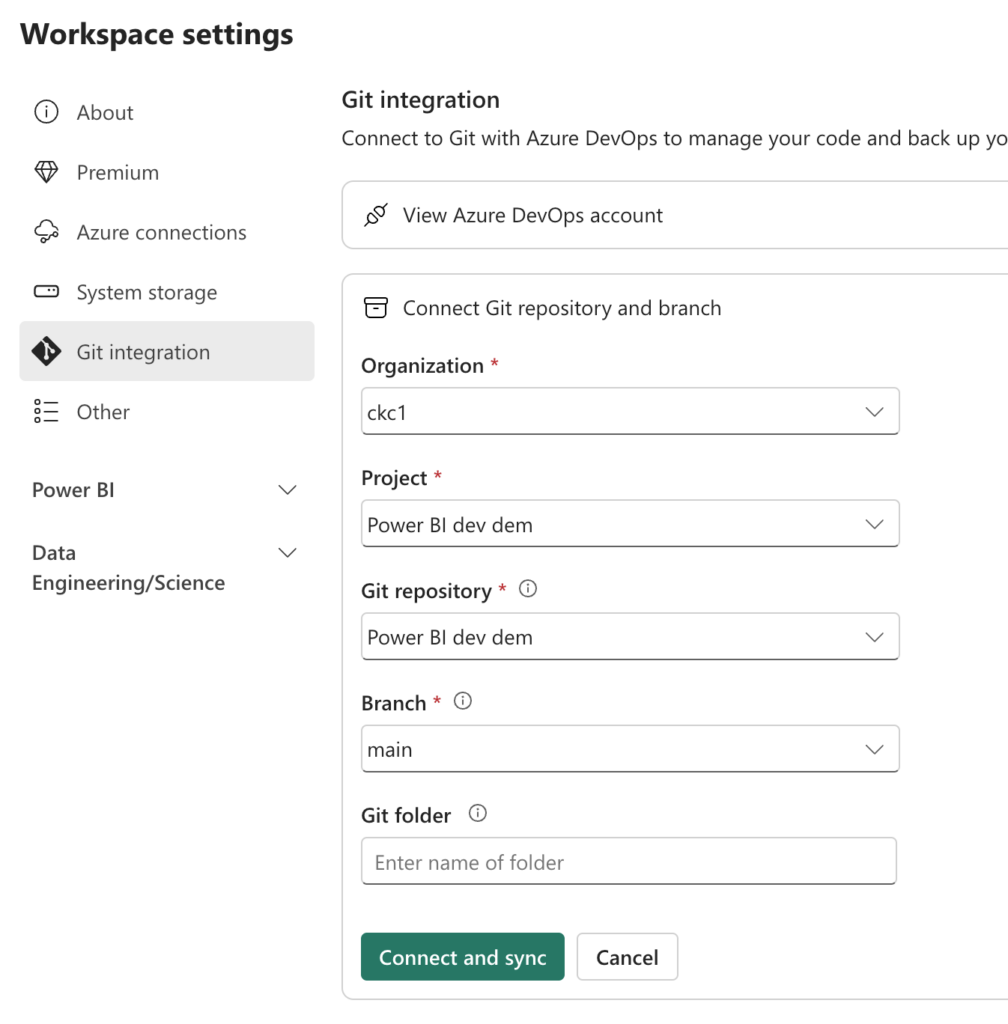
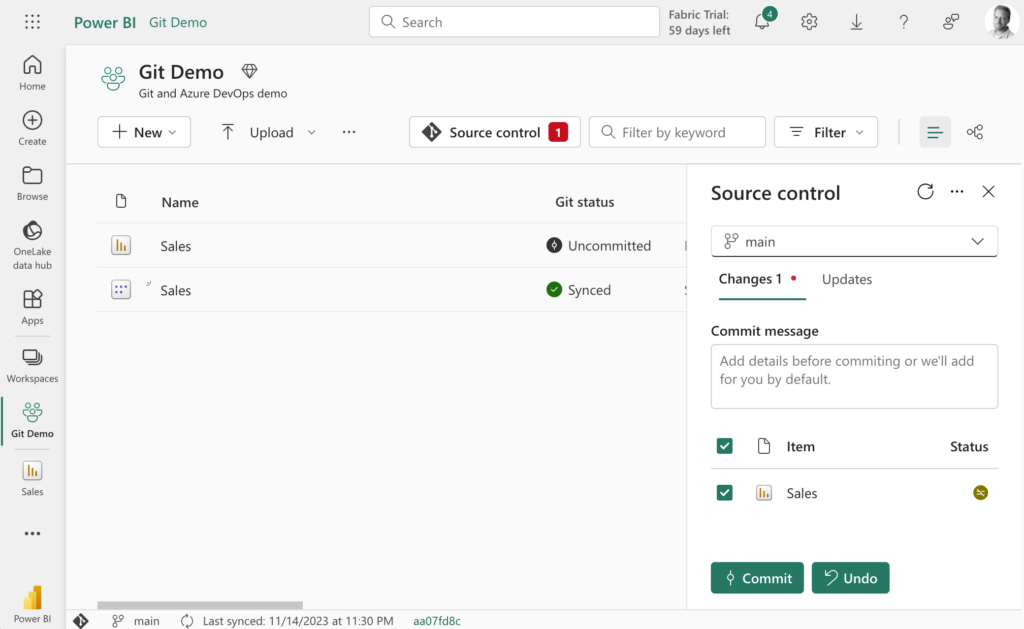
Wait a few seconds, and now the repo will be synched to your workspace. There will be no data in your model and reports, because the data is not synched to the repositry. But you can just refresh the data, and then you have it.
If you have a crazy report designer, who loves to do changes in the browser. You can also let him do that. You can just commit directly from the workspace, and it will be synched to all your developers laptops.
But yes. That is it. I think this is a great way, to setup your Power BI dev environment. I hope you can use it.
Everything here is based on a full day workshop I attended at Power BI next step with Mathias Thierbach and Rui Romano, and also an 1 hour session with Paulien van Eijk, where she covered the whole day, but in a faster pace.
You can also read more about this topic from MS here.
Leave a Reply